

TENS Electrode Placement Chart: A Comprehensive Guide
Discover effective pain management through precise TENS unit electrode placement; this guide details optimal configurations for various body areas,
enhancing treatment efficacy.
Transcutaneous Electrical Nerve Stimulation (TENS) therapy is a non-invasive pain relief method gaining popularity due to its accessibility and customizable nature. It utilizes a TENS unit to deliver low-voltage electrical currents through the skin to stimulate nerves. This stimulation aims to reduce pain signals reaching the brain, offering relief from both acute and chronic conditions.

TENS units are remarkably versatile, capable of addressing a wide spectrum of pain types, including arthritis, sciatica, muscle soreness, and fibromyalgia. The effectiveness of TENS therapy hinges on correctly positioning the electrodes to target specific pain points. Understanding proper electrode placement is crucial for maximizing the therapeutic benefits and achieving optimal pain management. This guide will provide a comprehensive overview of TENS therapy and detailed electrode placement charts.
DR-HOS devices, endorsed by the American Chiropractic Association and FDA-cleared, exemplify advanced TENS technology, combining TENS, EMS, and NMES with auto-modulating pulses for enhanced nerve and muscle interaction.
Understanding TENS Unit Components
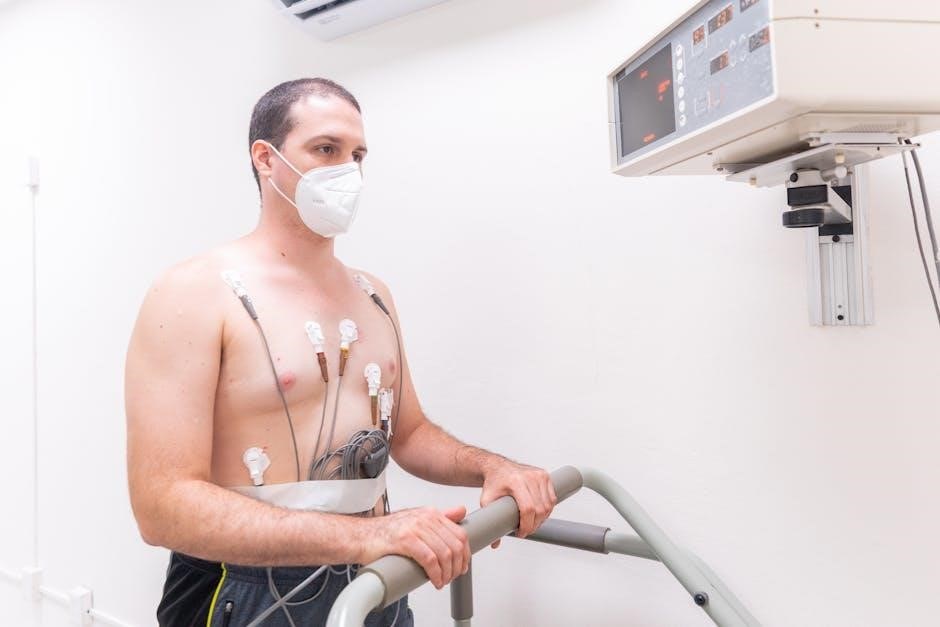
A typical TENS unit comprises several key components working in harmony to deliver effective pain relief. The core element is the unit itself, housing the circuitry that generates the electrical impulses. Lead wires connect the unit to the electrode pads, transmitting the current to the skin. These electrode pads, available in various sizes and materials, adhere to the skin at specific locations determined by a TENS electrode placement chart.
Channel control is another vital aspect; many units feature dual channels, allowing for independent stimulation of two different areas simultaneously. Intensity controls regulate the strength of the electrical impulses, customizable to individual comfort levels. Understanding these components and their functions is essential for safe and effective TENS therapy;
DR-HOS devices, utilizing AMP 4-in-1 Technology, demonstrate how integrated components can optimize stimulation for superior results, emphasizing the importance of proper electrode interaction.
Benefits of Proper Electrode Placement
Precise electrode placement, guided by a TENS electrode placement chart, is paramount for maximizing therapeutic benefits. Correct positioning ensures the electrical impulses effectively target the intended nerves, interrupting pain signals and promoting localized relief. Optimal placement can enhance muscle relaxation, reduce inflammation, and improve circulation in the treated area.
Incorrect placement, conversely, can lead to diminished effectiveness or even discomfort. Utilizing a chart helps avoid this, ensuring the current doesn’t simply stimulate skin without reaching the relevant neurological pathways. DR-HOS technology highlights this, emphasizing that optimized nerve and muscle interaction is key.
Effective TENS therapy relies on strategically positioned electrodes, delivering targeted pain relief and improving overall treatment outcomes, making a chart indispensable.
General Guidelines for Electrode Placement
When utilizing a TENS unit and referencing a TENS electrode placement chart, several guidelines are crucial for successful therapy. Electrodes should not touch; maintain at least one inch of separation to prevent current shunting and ensure focused stimulation. Placement angles – horizontal, vertical, or angled – can be experimented with to find what provides the best relief for the individual.
Generally, position electrodes on or near the pain site, but consider surrounding areas as well. Avoid placing pads over bony prominences or open wounds. DR-HOS emphasizes optimizing nerve and muscle interaction, suggesting thoughtful positioning is vital. Remember, wider electrode spacing generally results in a broader, less intense stimulation.
Always clean the skin before application (discussed later) and follow the chart’s recommendations for your specific condition.
Skin Preparation for Optimal Conductivity
Achieving optimal conductivity is paramount for effective TENS therapy, and proper skin preparation is key. Before applying electrodes, the skin must be clean and dry. Remove any oils, lotions, or sweat from the treatment area, as these can impede electrical current flow. A gentle wipe with rubbing alcohol can be beneficial, ensuring the skin is free of residue, but allow it to fully evaporate.
Shaving the area may be necessary if there is excessive hair, as hair can reduce electrode adhesion and signal transmission. Avoid using abrasive scrubs or harsh chemicals, which can irritate the skin. Healthy skin provides the best contact and minimizes impedance.
Proper preparation ensures a stronger, more comfortable, and ultimately more effective TENS experience, maximizing the benefits outlined in your TENS electrode placement chart.
Electrode Pad Types and Quality
Electrode pads significantly impact TENS unit effectiveness; understanding types and quality is crucial. Common types include conductive carbon, hydrogel, and silver/silver chloride pads. Hydrogel pads are popular due to their excellent adhesion and conductivity, offering comfort during longer sessions. Carbon pads are generally more affordable but may require more frequent replacement.
Pad quality varies greatly. Higher-quality pads maintain consistent conductivity for longer, providing more reliable pain relief as indicated in your TENS electrode placement chart. Look for pads with strong adhesive backing to ensure they stay securely in place during movement.
Regularly inspect pads for wear and tear; replace them when they lose adhesion or conductivity. Proper pad selection and maintenance optimize your TENS therapy experience.

Common TENS Electrode Placement Locations
Effective TENS therapy relies on strategic electrode placement, targeting specific pain areas. Common locations include the lower back, upper back, shoulders, neck, knees, and legs, as detailed in a comprehensive TENS electrode placement chart. For widespread pain, a more distributed placement may be beneficial.
Placement angles – horizontal, vertical, or angled – can be adjusted to optimize nerve stimulation. Avoid electrode contact; maintain at least one inch between pads for focused treatment. Generally, position electrodes on or near the pain source, experimenting to find the most effective location.
Two-channel units allow for broader coverage, utilizing four electrodes for varied configurations. Refer to your chart for specific recommendations based on your pain condition and unit type.
Back Pain Electrode Placement
For back pain, a TENS electrode placement chart is invaluable. Lower back pain often responds well to electrodes placed on either side of the spine, slightly above the painful area. Upper back pain may benefit from placement along the paravertebral muscles, avoiding the spine itself.
Consider a symmetrical placement, mirroring electrode positions on both sides of the body. Experiment with slight adjustments to pinpoint the optimal location for pain relief. Two-channel units allow for a wider coverage area, potentially encompassing more of the affected region.
Remember to follow the general guidelines: electrodes should not touch, and skin preparation is crucial for conductivity. Consult a chart for specific configurations based on your pain’s location and intensity.

Placement for Lower Back Pain
Effective lower back pain management with TENS relies on precise electrode placement, as detailed in a TENS electrode placement chart. A common configuration involves placing two electrodes on either side of the spine, at the level of the pain, avoiding direct contact with the vertebrae.
Alternatively, electrodes can be positioned horizontally, following the natural curves of the lower back. For broader pain, a diamond-shaped placement, with one electrode over the painful area and the others angled outwards, can be beneficial. Two-channel units enable simultaneous stimulation of multiple points.
Ensure the electrodes are at least one inch apart and firmly adhered to clean, dry skin. Adjust the intensity gradually, and consult a healthcare professional if pain persists or worsens.
Placement for Upper Back Pain

Managing upper back pain with TENS therapy requires strategic electrode placement, guided by a comprehensive TENS electrode placement chart. A typical approach involves positioning two electrodes on either side of the spine, targeting the affected muscles and avoiding direct vertebral contact.

For broader discomfort, a horizontal placement along the upper back muscles can provide relief. Utilizing a two-channel unit allows for bilateral stimulation, addressing pain on both sides simultaneously. Diamond configurations, with one electrode over the pain and others angled outwards, are also effective.

Prioritize clean, dry skin for optimal adhesion and conductivity. Gradually increase the intensity until a comfortable tingling sensation is achieved, and always consult a healthcare provider for persistent or worsening pain.
Shoulder and Neck Pain Electrode Placement
Effective shoulder and neck pain relief with TENS therapy hinges on precise electrode placement, as detailed in a reliable TENS electrode placement chart. For neck strain, position electrodes vertically along the sides of the neck muscles, avoiding the front or directly over the spine.
Shoulder impingement often benefits from electrodes placed on the front and back of the shoulder, encircling the painful area. Two-channel units enable simultaneous stimulation of both the neck and shoulder. Experiment with electrode angles – horizontal, vertical, or diagonal – to find what provides the most comfort.
Ensure good skin contact and gradually increase intensity. Remember to consult a healthcare professional for persistent pain or if symptoms worsen despite treatment.
Placement for Neck Muscle Strain
Targeting neck muscle strain effectively with TENS requires strategic electrode placement, guided by a comprehensive TENS electrode placement chart. Typically, two electrodes are positioned vertically on either side of the affected muscles in the neck, avoiding direct placement over the spinal column or the front of the neck.
A two-channel unit allows for broader coverage, potentially adding electrodes to the upper shoulder area to address referred pain. Ensure the electrodes don’t touch, maintaining at least one inch of separation for optimal current flow. Experiment with slight adjustments in electrode position to pinpoint the most effective stimulation.
Gradually increase the intensity until a comfortable tingling sensation is felt, and avoid settings that cause muscle contractions.
Placement for Shoulder Impingement
Addressing shoulder impingement with TENS therapy necessitates precise electrode placement, as detailed in a reliable TENS electrode placement chart. A common approach involves positioning two electrodes on the deltoid muscle, superior and inferior to the painful area, avoiding direct placement over the bony prominences.
Utilizing a two-channel unit, additional electrodes can be applied to the upper back muscles, targeting the rhomboids and trapezius to address postural imbalances contributing to impingement. Maintain a one-inch gap between electrodes to prevent current interference. Experiment with electrode angles – horizontal, vertical, or diagonal – to optimize pain relief.
Start with a low intensity and gradually increase until a comfortable tingling sensation is achieved, avoiding any muscle contractions.
Knee and Leg Pain Electrode Placement
Effective management of knee and leg pain with TENS therapy relies on a well-consulted TENS electrode placement chart. For general knee pain, position electrodes flanking the patella – one on the medial and one on the lateral side – ensuring they don’t overlap. Alternatively, electrodes can be placed on the hamstring or quadriceps muscles.
When addressing specific conditions like osteoarthritis, focus placement around the joint line. For broader leg pain, consider placing electrodes along the affected muscle group, maintaining at least an inch between pads. Two-channel units allow for bilateral placement or targeting multiple pain points simultaneously.
Remember to clean the skin and use fresh, high-quality electrode pads for optimal conductivity and comfort.
Placement for Knee Osteoarthritis
Managing knee osteoarthritis pain with TENS requires strategic electrode placement, guided by a detailed TENS electrode placement chart. A common approach involves surrounding the knee joint; position one electrode superior to the patella and another inferiorly, avoiding direct contact with the kneecap itself. Alternatively, electrodes can be placed medially and laterally around the joint line.
For optimal results, ensure the electrodes bracket the primary area of discomfort. Utilizing a two-channel unit allows for a more comprehensive approach, enabling simultaneous stimulation of both sides of the knee or targeting different pain generators. Proper skin preparation is crucial for effective conductivity.
Remember to adjust intensity gradually and monitor skin for any irritation. Consistent use, guided by a chart, can provide significant pain relief.
Placement for Sciatica
Addressing sciatic pain with TENS therapy necessitates precise electrode placement, as detailed in a comprehensive TENS electrode placement chart. Typically, placement focuses on the lower back, near the origin of the sciatic nerve. One electrode is often positioned in the lumbar region, near the painful area, while the second is placed along the path of the sciatic nerve – often on the buttock or upper thigh.
A two-channel unit can enhance treatment by allowing for stimulation at both the nerve root and along the nerve pathway. Experimentation with electrode positions, guided by the chart, is key to finding what works best for individual pain patterns.
Ensure proper skin preparation and gradual intensity increases. Consistent application, informed by a chart, can significantly reduce discomfort.
Two-Channel TENS Unit Electrode Configurations
Utilizing a two-channel TENS unit offers expanded therapeutic options, as illustrated in a detailed TENS electrode placement chart. This configuration allows for simultaneous stimulation of two distinct pain areas or a more comprehensive treatment of a single region.
Common setups include placing one channel on either side of the pain, creating a broader field of stimulation. Alternatively, one channel can target the primary pain site, while the second addresses referred pain or muscle spasms. The chart demonstrates various configurations for back pain, shoulder impingement, and knee osteoarthritis.
Remember to maintain adequate spacing between electrodes within each channel and avoid overlap. Experimentation, guided by the chart, is crucial for optimizing pain relief and maximizing the unit’s potential.
Safety Precautions and Contraindications
Prioritize safety when using TENS therapy; a comprehensive TENS electrode placement chart doesn’t replace understanding contraindications. Avoid electrode placement over the eyes, carotid sinus, or directly over the heart, especially if you have a pacemaker.
Individuals with epilepsy, pregnancy, or deep vein thrombosis should consult a healthcare professional before use. Never use TENS while driving or operating machinery. Ensure the skin is clean and dry before applying electrodes to prevent irritation.
Always start with the lowest intensity and gradually increase it to a comfortable level. Discontinue use if you experience skin irritation, burning, or increased pain. Refer to your device’s manual and the chart for specific warnings.
Finding a TENS Electrode Placement Chart PDF
Locating a reliable TENS electrode placement chart PDF is crucial for effective therapy. Many manufacturers, like DR-HOS, offer downloadable charts specifically designed for their units, optimizing nerve and muscle interaction.
Online searches using keywords like “TENS unit electrode placement guide PDF” or “TENS therapy placement chart” yield numerous results. Verify the source’s credibility – prioritize medical websites, manufacturer sites, or resources endorsed by healthcare professionals.
Consider searching the website of the American Chiropractic Association, as DR-HOS devices are endorsed by them. Download and save the PDF for easy access during treatment sessions, ensuring proper electrode positioning for targeted pain relief.